
This guide will help you make intarsia art from wood. This information includes information about Wood types, patterns and tools as well as techniques. Read on to learn more about this exciting craft. You might want to try different wood types depending on your skill level. To get an idea of the process, you can make a sample piece if you are new to the craft.
Patterns
Woodworkers who are skilled can make many intarsia projects including holiday, tree and flower ornaments. These intarsia patterns are for all skill levels. They also showcase the beauty of the process. There are 21 full-size patterns in this book, as well as helpful information about wood, shaping, and blades.
Using contrasting wood species, intarsia is an exciting and original way to build a piece of furniture or an artistic wall hanging. It is similar to making a puzzle out of different pieces. The wood is then polished or stained, and each piece is assembled to create a unique design that adds depth and character to the finished project. Intarsia wood patterns can be extremely challenging to make, so finding a good source of free intarsia patterns will help you make the right decisions for your project.
Tools
You need to have special tools for intarsia. A small belt sander is an excellent tool for removing material quickly and smoothing the edges. A dremel, or flex shaft, can be useful if you are looking for a tool to shape and sand fine details. You can use these tools to create small areas or shape them with different tools.

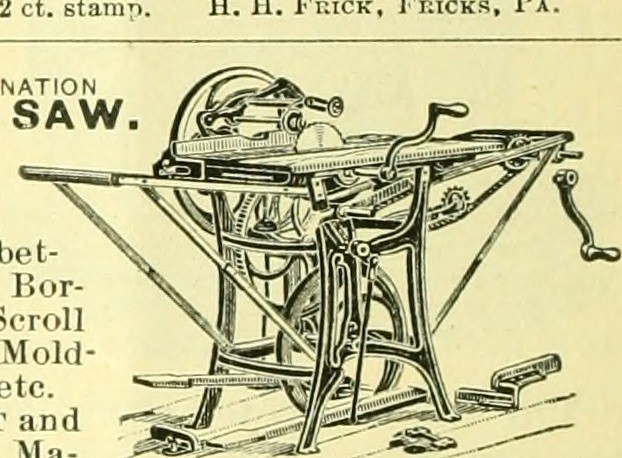
Jigsaws: Jigsaws work well for cutting wood but are not able to make intricate cuts like a scrollsaw. You will also need sanders to smooth out wood surfaces. Two different wood types are needed for intarsia work. The wood will then be stained differently. Once the wood has been cut it will be sanded to make a mosaic-like design.
Techniques
You don't have to be a pro at intarsia. It is possible to create beautiful pieces of art if you know the right techniques. A pattern can be a great starting point to your artistic creativity. You'll be well on the way to creating stunning pieces of intarsia wooden art with these ideas. Here are some techniques:
First, pick the project design. Make additional copies of the pattern. Next, select the type of wood that you want to use. Different species of wood have different characteristics. Your project will have a deeper and more interesting dimension if you rough out the thickness of each wood piece. You can also add pieces to your project by gluing extra layers of wood. Finally, finish your project by cutting off any extra backing and leaving the fully finished intarsia piece.
Woods to Use
The new book provides the tools and techniques you need to make unique inlaid pieces. With Kathy's progressive approach to teaching, you'll learn about everything from the basics to the nuances of color breaks. This book is a must-read for anyone interested in making intarsia.
First, choose woods that complement one another and have the same grain orientation. For example, a Teddy will need 20 pieces made of four different wood types. Each one has a slightly unique grain. This means you'll need a saw with a high-speed blade. Once you've identified the wood's colors and grain orientation, it is time to cut and stain.
Colors
Intarsia wood is available in many colors. While saps and heartwoods are either reddish brown or grey black, they are both white. Some woods like cherry will darken as they age. Cherry is a light-colored wood that begins life with a pale tone. It becomes medium-colored as it is exposed to sunlight. Other woods, like cedar, have varying tones within a board. This gives your project depth.
Intarsia refers to a type art made by joining different pieces of wood together and creating patterns. It was first created in the Islamic region, but it is commonly associated with Italy today. Woodworkers use different shades of wood, with varying thicknesses, to create a three-dimensional effect. Intarsia is often used on jewelry boxes as well as wooden chests and keepake boxes.
Time-consuming
Intarsia requires a variety of staining and wood types. Intarsia artists need to have different types of wood and different stains in order create beautiful patterns. You can use plywood or birch, but there are other wood options. Artists choose the wood they prefer, but it all depends on their individual preferences. For intarsia projects, many craftsmen prefer Western Red Cedar.
Intarsia woodworking begins with the cutting and labeling of inlay pieces. The artist then glues the pieces together. Once the glue has dried, the woodworker finishes the piece as with a double bevel inlay. This process is time-consuming and requires a lot skill. However, the final product is truly an art piece.
FAQ
Is it possible to refinish your own furniture?
Yes! There are many different ways to refinish older furniture without the need for professional help. Here are some examples:
Use sandpaper for removing stains and scratches. Next, wipe the surface clean with a damp cloth.
Apply clear polyurethane paint. Allow to dry completely before moving furniture.
Use acrylic paint to paint furniture.
Stain can be used instead of paint. You can give your furniture a rich appearance with stain.
Apply shellac wax. Wax will protect the wood and add shine.
What are the basics of woodworking?
You can start building furniture by making a bench. This project can easily be done using whatever wood you have at your house. You don't need to know which type of wood you should use. Instead, get some pine boards at Lowes or Home Depot. After building your bench, sand off any rough edges and apply a stain or varnish.
Is it hard to start my own woodworking business?
It can be difficult to start your woodworking business. There are many regulations and legal requirements that you will need to comply with. However, it doesn't necessarily mean you must go through all the hassle of setting up a business. Many people decide to join established businesses. This way, you only need to pay membership fees and taxes.
How can I tell what kind of wood I am working with?
Always read the label when purchasing wood. The label should provide information about the wood species, moisture content, and whether preservatives have been used.
Statistics
- In 2014, there were just over 237,000 jobs for all woodworkers, with other wood product manufacturing employing 23 percent; wood kitchen cabinets and countertop manufacturing employing 21 percent. (theartcareerproject.com)
- Overall employment of woodworkers is projected to grow 8 percent from 2020 to 2030, about as fast as the average for all occupations. (bls.gov)
- If your lumber isn't as dry as you would like when you purchase it (over 22% in Glen Huey's opinion…probably over 10-15% in my opinion), then it's a good idea to let it acclimate to your workshop for a couple of weeks. (woodandshop.com)
- The U.S. Bureau of Labor Statistics (BLS) estimates that the number of jobs for woodworkers will decline by 4% between 2019 and 2029. (indeed.com)
External Links
How To
How to stain wood
Staining wood is the process of applying chemicals to the wood's exterior, which alters its color. This chemical reaction changes the wood's color from white to brownish. While oak is the most widely used type of wood for staining purposes, other types of wood are also available.
There are many methods to apply stain to wood surfaces. You can mix the stain with a solvent, such as turpentine, and spray it onto the wood. You can also apply a solution containing water and dye directly to the wooden surface. You can mix stains into varnishes or paints to make them part of your finish coat.
The first step in staining wood is preparing the surface. To apply the stain, clean the wood completely. Sanding the wood removes scratches and imperfections. The next step is to determine the type of stain you would like to use. There are two main kinds of stains available: non-penetrating stains and penetrating. Penetrating and non-penetrating wood stains penetrate deeper than other types, making them perfect for dark colors like mahogany. Penetrating stains are best paired with lighter colors, such as maple.
You will need to decide on the type of stain you want to use, and then prepare your tools. Because you can spread the stain evenly with a paintbrush, it is ideal for applying them. A few rags are also handy to clean up any spillages after you have finished painting. If you plan to mix the stain yourself, make sure you have enough containers available to hold the different components of the mixture.
Once you have prepared all your materials, it is time to clean the areas where you will stain the wood. Use soap and warm water to remove dust and grime. Wipe down all furniture pieces with a dampened cloth and clean water. Be sure to get rid of all loose material, especially if staining is planned for darker wood.
Apply the stain. Begin at one end and spray or brush the stain on the wood. Work slowly and carefully, moving back and forth along the grain of the wood until you reach the opposite end. The stain should not drip off of the wood's edge. Before moving on to the next steps, allow the stain drying completely.
A coat of clear polyurethane sealing agent is applied to protect the paint. Three coats are recommended for polyurethane. Allow the third coat, which should dry overnight, to dry before sanding.