Woodcarving can seem daunting for beginners. These are some tips to help you start your first project in animal carving.
Dog
If you are an aspiring woodcarver, you will definitely benefit from the numerous free dog wood carving patterns available online. These patterns will help you to carve your dog in different sizes and styles. These are the tools that you'll need to carve your pet dog. A band saw or the coping saw are necessary, along with chisels, mallets, and time to polish. Once you have these tools, you can start carving.
Eagle
Native Americans regard the baldeagle as a traditional symbol for strength, courage, wisdom, and perseverance. Its main purpose was to serve as the creator's messenger, measuring about 20 inches across and five inches wide. The eagle today is a popular choice in wood carvings. You can choose from a variety of woods to make eagle carvings. This article will focus on some of the most popular wood carving styles.
Bear
Carving a bear in wood is an easy project. It has several distinguishing lines and shapes. Each line carries more weight. The front paws of a bear are angled opposite the leg lines for added visual interest. You might consider buying a book that will teach you how to make a bear. James Miller's book describes the entire process.
Elephant
A wood elephant carving can add a unique touch to your home. 1stDibs has 56 antique carved wooden elephants and two modern pieces. These pieces have been produced as far back as the 19th century, and have become increasingly popular in recent years. You can choose from Art Deco (Mid-Century Modern), Folk Art, or a smaller piece for a subtle addition to your home decor.
Moose
You can carve a moose head or antlers by using moose antlers. Dowels can hold moose antlers or paddles. These will need to be pushed in and possibly glued in place. Then you can paint or color the moose with a walnut gel stains.
Template for the Moose
Carvers can use a moose carving template to help them create realistic-looking carvings. You can color moose carvings with paints or stained them with walnut gel stain. This animal is very easy to carve once you know the basics. To finish the project, you can use a brush to add fur and eyes or a typhoon tool on a grinder to grind details. The Moose template is ideal for beginner wood carvers who want to carve an animal.
Bear template
To begin a bear wood carving, you'll need a template. You can then use a Dremel instrument to examine the wood features. Stop cuts can be made to separate the legs and the lower body using this tool. You can also make small V cut in the legs to indicate their split. After completing the ear and leg parts, you can round the underbelly. Make sure to leave an open space at the back to continue to shape the bear.
Eagle template
Three templates are necessary to carve an Eagle. One template is needed for carving the eagle, while the other one will be used as a work paper template. This will allow you to cut out patterns and use the working paper. As a reference, the third template will be used. Next, use the tools to cut the main lines of your template. It is important to ensure that you align the lines with the pattern line. Make sure that all of the marks are aligned.
Template for the mouse
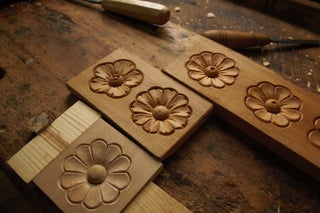
For those who are new to wood carving, there are many options. Using a template will make this task much easier, and there are even printable patterns available to help you along the way. A simple geometric pattern is a good starting point if you're just beginning. Next, you can learn more complex patterns. Once you know the basics, the rest will come easy.
FAQ
Can I refinish furniture that I make?
Yes! There are many different ways to refinish older furniture without the need for professional help. Here are some ideas:
Use sandpaper on the surface to remove any stains or scratches. After that, use a clean towel to wipe the surface.
Apply clear polyurethane finish. Allow to dry completely before moving furniture.
Acrylic paint is a great way to paint furniture.
Stain can be used instead of paint. The furniture will get a rich look with the stain.
Shellac wax can be applied. Applying wax will give the wood shine and protection.
What woods can be used to make furniture?
Woods are classified according to their hardness. Softwoods include cedar, pine, cedar, and Cypress. Because they resist rot, softwoods can be used to make outdoor furniture. Hardwoods include oak, maple, mahogany, and teak. Because they can't weather outside, they're usually used indoors.
What time does it take for furniture to be finished?
It all depends on how large the furniture is. A smaller project like picture frames or boxes can be completed in a single day. Larger projects such as tables and desks can take several days to complete. It takes time to stain and seal the wood properly.
How much will it cost to get started?
Because every project is unique, there aren't exact numbers. Consider these factors if you need to estimate the amount of money that you will require.
-
Material costs
-
Tools and equipment
-
Time spent working on the project
-
Your hourly rate
-
What profit are you expecting to earn?
-
Whether you plan to hire help
If you're just starting out, you may decide to start small by making simple items such as boxes and picture frames. As you gain experience, more difficult projects will become possible.
What wooden items sell well?
The most successful wooden items are made from sustainable wood.
The most popular types of wood for furniture include oak, maple, cherry, mahogany, walnut, and teak.
These woods are extremely strong but also have beautiful colors and grain patterns. They also last for many years if cared for properly.
Wooden furniture should always be painted first to protect against moisture damage. This applies to all surfaces, even drawers and doors.
If you want to make sure that your furniture lasts as long as possible, then you should choose a paint that is resistant to water.
It is recommended to use an oil-based primer, then apply two coats. It is possible to apply multiple coats depending on how heavy the wear.
Avoid spray cans and aerosol paints. These products can evaporate quickly and emit harmful fumes.
Can I make a living doing this?
Yes! Many woodworkers are already doing so. According to the U.S. Bureau of Labor Statistics, the median annual woodworker wage was $34,000 in May 2012. That's higher than the national average of $31,000 per year.
How do I know what tools are best suited for me?
It's important to consider your preferences and needs when buying tools. What do you prefer: metal or plastic handles? What size nails and screws do you usually use? Do you prefer hand tools over power tools?
Statistics
- Woodworkers on the lower end of that spectrum, the bottom 10% to be exact, make roughly $24,000 a year, while the top 10% makes $108,000. (zippia.com)
- The U.S. Bureau of Labor Statistics (BLS) estimates that the number of jobs for woodworkers will decline by 4% between 2019 and 2029. (indeed.com)
- Average lumber prices rose about 600 percent between April 2020 and May 2021. (familyhandyman.com)
- Most woodworkers agree that lumber moisture needs to be under 10% for building furniture. (woodandshop.com)
External Links
How To
How can you measure wood accurately?
We use several methods to measure wood. A digital caliper is a tool that measures distances. We also use a laser level to ensure your work surface flattens.
Two jaws can be opened and closed on a digital caliper. One jaw holds the object being measured and the other measures the distance between them. The digital caliper is great for measuring small distances like thicknesses of wood.
Laser levels are equipped with an infrared light beam, which projects a line across a floor. The laser emits an infrared light beam that projects a line across the floor. If you look down on the line, it will show whether the surface appears even or not. Laser levels are ideal for checking the accuracy on large surfaces.
Bubble levels look similar to a compass. The device has a bubble at its center. As long the bubble is not in the middle, the device will show you whether the surface of the object is level. Bubble levels can be used for checking the accuracy in smaller areas.