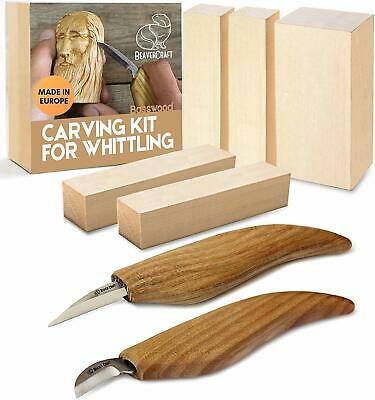
Sharp edges enhance the enjoyment of wood carving. Here are some methods that you can use to sharpen your wooden carving tools. Sharp edges are also more durable and last longer than dull ones. Sharp edges are more efficient and allow you to use your tools more effectively. Sharp edges are easier to carve and provide the best cutting performance. Here are three methods for sharpening wood carving tools. Continue reading to learn more. - Using a Sharpening Stone.
Sharp edges enhance carving pleasure
Sharp tools are not only better for carving, but tools with razor-sharp edges make it easier. Sharp tools are easier to use and allow for more control when carving. Also, a blade that has been sharply cut leaves a smooth surface. Sharp tools are key to a successful carving project. Sharpen your tools often to achieve the best results. Regular sharpening will ensure that your tools are sharp and can make carving much more enjoyable.
While carving may be more enjoyable with sharp edges, it can lead to blisters. Wood's natural texture can be rough so regular handling will make the skin more resilient. Calhouns will develop from the blisters. However, this is a slow and painful process. Try changing how you hold your tools if you notice blisters while carving. It may take some practice, but the effort will be well worth it.
Start by sharpening your knives with a sharpening tool and a fine-grained rock. You should also check for any damage on the edge. Chips along the edge will need to be ground more vigorously. A dull edge may require minimal grinding on a finer grade grit. You can also test the knife by slicing through a piece or paper of rope. You don't need to use a sharpening knife if your knife has been dull for a while.
Common techniques for sharpening wood carving tool
There are many ways of sharpening wood carving tool. There are many ways to sharpen wood carving tools. Oil stones need oil to be applied to the stone's surface in order to prevent metal particles embedding into the surface. For sharpening carbide-wood carving tools, ceramic and diamond stones do not require oil. This article will explain the most popular methods for sharpening wood carving tool.
A leather strop can be used to remove wire edges from blades and polish them. A leather strop is good for all tools. However, some carvers prefer a more textured one. Flat leather strops work well for straight tools as well as the outside edges of gouges. Those who are serious about their work may want to invest in a leather strop with grooves.
Bench chisels have been sharpened traditionally at a 25-degree angle, with a secondary bevel of 5 degrees. Modern alloys are not compatible with these angles and may crack. To correct this, raise the angle of bevel. This requires using more force and will result in less control. Block planes are also usually sharpened at 20 degrees.
A sharpening iron is required
A sharpening knife is a tool that can be used for wood carving. The stone is made up of grit which is a crystalline mineral that is much harder than steel. It also has sharp edges. In most cases, the stone will need a lubricant to facilitate the cutting action and prevent metal particles from getting embedded in it. Sharpening your tool will make it easier for it to work with wood. The strop, which is typically made of leather, polishes the edge and removes the burr.
There are various types of sharpening stones available in the market. There are oilstones that can be used for sharpening, waterstones and ceramic stones. Oil stones use oil as a liquid to keep fine metal particles and other contaminants from sinking into the stone. No lubricants are required for ceramic or diamond stones. They can both be used to sharpen carbide wood carving tools.
Sentima is an excellent example of a high-quality sharpening system. It features a coarse and fine stone, both made of corundum. This material features a consistent grain that allows for fast cutting and smooth finishes. Its unique design also makes it easy to clean. The sharpening tool is made of durable materials so it can last for many years.
FAQ
What is the difference between plywood and particle board?
Plywood can be described as a mixture of layers and wood that have been pressed together with pressure. Plywood can come in many thicknesses and is used for flooring and cabinets. Particle board is made from sawdust mixed with resin and then compressed into large blocks. It's used for home improvement projects. Both types of boards can be easily cut and are durable.
What material would you recommend to start learning woodworking?
Start off with softwood like pine and poplar. After you are comfortable with the softwoods, move to hardwood.
What else should I know about woodworking in general?
It's easy to underestimate the amount of work involved in making furniture. The hardest part of the process is actually finding the right wood. There are so many wood options that it can be difficult to choose the right one.
A problem is that wood doesn't have the same properties. Woods can warp, split, or crack over time. Before purchasing wood, you should consider these factors.
How can I organize my shop?
The first step toward keeping your workshop clean and organized is to set aside a designated area for storing tools. Keep your tools away from dust and debris, so they stay sharp and ready to work. Hang tools and accessories using pegboard hooks.
What kind wood should I use for my project?
Oak, maple, cherry and mahogany are the most common wood types used for woodworking. Each wood variety has distinct characteristics that influence the final product's look and feel. Oak is a darker wood and tends to be more durable than other types. Birch, which is lighter and soft, is more heavy than mahogany. You can also pick between veneers and solid wood. Veneers are thin sheets of wood that are glued together to form a single layer.
What's the difference?
Hobbyists are passionate about making things from wood, while professionals tend to be more focused on the quality and craftsmanship of their work. Hobbyists take great pride in their creations, and share them with family and friends. Professionals will spend hours researching designs and then begin to create a project. They will meticulously plan every detail of their work from choosing the right materials to finishing it.
How long does it usually take to complete a piece furniture?
It depends on which wood you choose, how complicated your design is and what amount of finishing you apply. Hardwoods, on the other hand, are more durable than softwoods. Hardwoods are more expensive than other woods. However, they are stronger and more resistant to moisture. Finishing furniture can take anywhere from one week up to three months.
Statistics
- Most woodworkers agree that lumber moisture needs to be under 10% for building furniture. (woodandshop.com)
- If your lumber isn't as dry as you would like when you purchase it (over 22% in Glen Huey's opinion…probably over 10-15% in my opinion), then it's a good idea to let it acclimate to your workshop for a couple of weeks. (woodandshop.com)
- The best-paid 10 percent make $76,000, while the lowest-paid 10 percent make $34,000. (zippia.com)
- In 2014, there were just over 237,000 jobs for all woodworkers, with other wood product manufacturing employing 23 percent; wood kitchen cabinets and countertop manufacturing employing 21 percent. (theartcareerproject.com)
External Links
How To
How to properly use a saw
Hand saws are used for cutting wood into pieces. These saws are most commonly used to cut wood into pieces. A handsaw is a tool made of metal or plastic that cuts material like wood, plastics, metals and others.
The best thing about a handsaw is the ability to make precise cuts at all angles and without needing adjustment. Sharpening them is easy, unlike with power tools. However, there are some disadvantages as well. You must be careful when transporting them, as they can be heavy and bulky. If you are not familiar with how to use one you may injure yourself.
There are many ways you can hold a saw. While cutting, keep your fingers away from the blades. If you don't, you might get hurt. When holding the saw, you should place your fingers around the handle, keeping your thumb up near the top of the blade. You won't accidentally touch it.
It is important to not put anything under the piece you are cutting when using a handheld saw. This would result in the blade slipping off the wood's surface. Before you begin cutting, make sure to inspect the area. You must ensure that no nails, screws, or any other objects are under the wood.
You should always wear safety goggles when working with a hand saw. Safety glasses protect your eyes from dust and make it easier to see what the hand saw is doing. Safety glasses also protect your eyes from flying debris.
First, learn how to safely use a hand saw. Practice until you feel comfortable cutting. Once you master the basics you'll be able to easily cut most anything.