You can start by learning the basics of whittling if you're just starting out. Choose wood, a knife, and some tools. This article will teach you about wood types, tools, and techniques. Once you have the basics, you can begin your own whittling projects. There are many types to choose from when it comes to whittler projects.
Wood
There are thousands upon thousands of wood types. But these woods are best for whittling. If you are just starting to whittle, the woods on this list will help you get the hang of the craft. There are many methods to whittle wooden pieces to make different shapes. Listed below are a few simple techniques for whittling wood.
The pull stroke: You need to align the blade with the grain of the wood when carving wood. This will help avoid damaging the wood. To tell the direction of the grain of wood, look for dark streaks running through the wood. These streaks will indicate the direction of your blade when you are whittling wood. When using the pull stroke, the blade will not cut through the wood as effectively as the push stroke.
Knife
You can learn the basics of woodworking by whittling with your knife. Although you may be a novice at this, the right technique can give you great control and allow you to make precise cuts. You can practice the pull stroke with small pieces of soap by using a knife to cut them. Practice makes perfect. It is easier to tackle beginner projects, and they become more challenging as you go along.
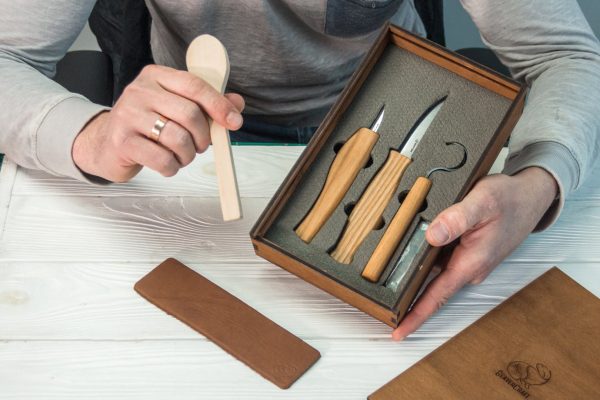
Before starting whittling, you'll need a knife. A pocket knife works well because it's sharp enough for shavings. Avoid knives with wide, long blades, as these can cause choking and shouldn't be used for this task. You should choose a narrower blade to make it easier and faster to sharpen. You can also use the frame saw, if you have one.
Techniques
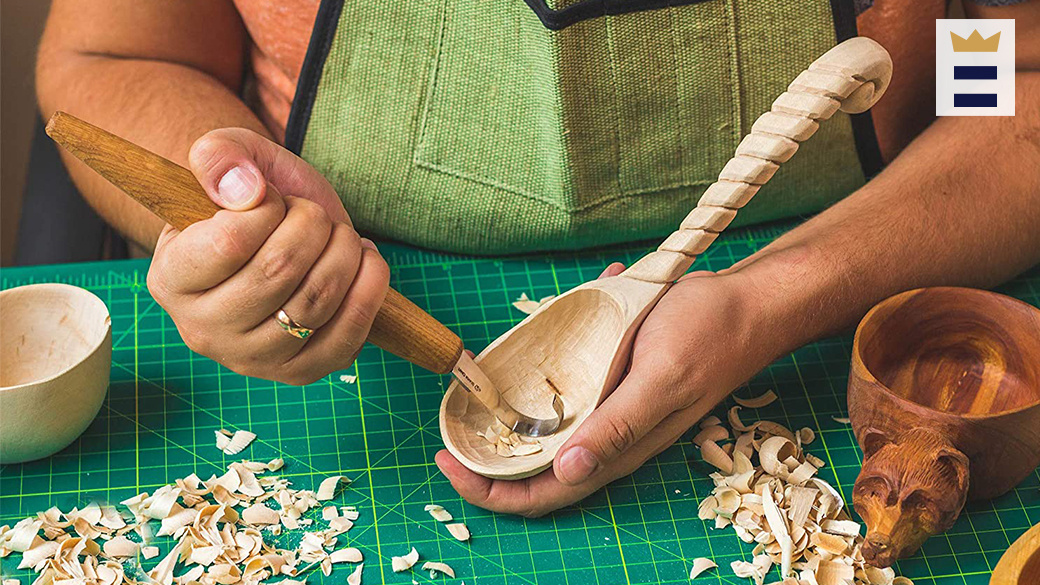
There are several techniques that can be used to improve your whittling abilities. The pull stroke is the most common. It involves bracing the right thumb against the wood and pinching the right fingers. Then you will draw the knife towards your right thumb while maintaining the knife straight. This stroke is very precise and controlled. It gives you much more control over your knife. This technique is best for detailed cuts.
There are 2 types of whittling guides. The Old Time Whittling book is the best reference book for complete beginners. The Little Book of Whittling, which has a wide range of whitling tips and tricks, is another great book. Many whittling ideas can be found in The Whittling Handbook. The Art of Whittling has some advanced projects. This book also contains simple puzzles, such as the ball and cage patterns.
Tools
Finding the right wood for your projects is the first step to making whittling instruments. You can use found wood, but it's best if you collect greenwood. Greenwood is easier than drying wood to carve. Also, deadfall branches are also available at any season. Although small trees can be taken at any time of the year, they are best when cut in winter. You must ask permission to collect wood if you are working on private property.
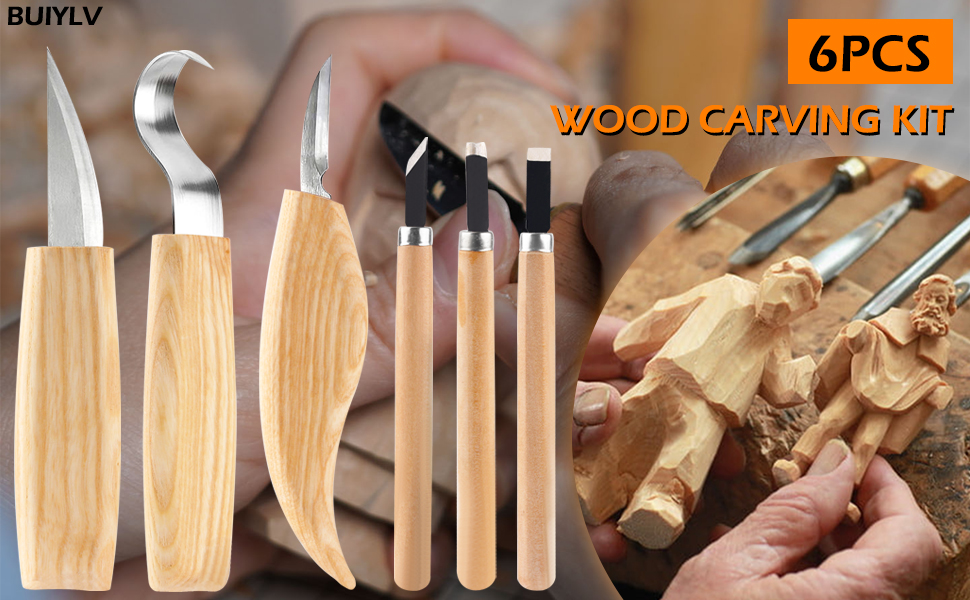
There are many sets that can help you get started. The Delicacy Carving Set includes 12 tools as well as a blank for a wooden spoon and a knife-sharpener. The set also comes with protective gloves and a carry case. You'll use them for a long period of time so it's worth investing in a set. This set is also an affordable way to get started.
Projects for beginners
A simple project such as a walking stick is a good starting point for someone who is new to wood whittling. You can work your way up to more complex projects, like carving faces on walking sticks. Comfort Birdie, a bird for beginner whittlers, may offer some comfort. Another beginner whittling project is a swan. These are great gifts to give children and easy to make even if your a beginner.
Another project that is considered a beginner project is a carved ball in a cage. You can make intricate designs or match feathers with your theme. Tiki idols can also be created. There are many options, but it is always a good idea have a template to help you get started. This will help you to know which pieces and tools are appropriate.
FAQ
What is the hourly rate for a woodworker?
The hourly rate for a professional woodworker varies depending on many factors, including skill level, experience, availability, location, and other variables.
A skilled woodworker can expect an hourly rate of $20-50.
A less experienced woodworker may charge as little as $10 an hour.
What's the time taken to finish a piece furniture?
It depends on the size and condition of the furniture. You can finish smaller projects, such as boxes or picture frames, in one day. Larger projects such as tables and desks can take several days to complete. It takes time in order to properly stain or seal the wood.
How can my shop be organized?
The first step toward keeping your workshop clean and organized is to set aside a designated area for storing tools. Keep your tools away from dust and debris, so they stay sharp and ready to work. To hang accessories and tools, use pegboard hooks.
What is the difference in a hobbyist and professional woodworker?
Hobbyists enjoy making things out of wood, whereas professionals focus more on the quality of their work. Hobbyists are proud of their creations and will often share them with family members and friends. Before they start working on a project, professionals will spend hours researching the designs. They will pay attention to every detail, from selecting the best materials to finishing the project perfectly.
How can a novice woodworker make it big?
Many people are looking to create their own furniture and start an internet business. But if you're just getting started building furniture, there are other ways to earn money besides selling on Etsy. You can sell at local craft fairs. Offering workshops could be another option for those who are interested in learning how to build their furniture. You might be able to offer services like remodeling homes or making custom pieces for clients if you are a skilled carpenter.
Statistics
- The U.S. Bureau of Labor Statistics (BLS) estimates that the number of jobs for woodworkers will decline by 4% between 2019 and 2029. (indeed.com)
- Average lumber prices rose about 600 percent between April 2020 and May 2021. (familyhandyman.com)
- The best-paid 10 percent make $76,000, while the lowest-paid 10 percent make $34,000. (zippia.com)
- Overall employment of woodworkers is projected to grow 8 percent from 2020 to 2030, about as fast as the average for all occupations. (bls.gov)
External Links
How To
How to properly operate a handsaw
Hand saws are used to cut the wood into pieces. The most common types of hand saws are circular saws, jigsaws, table saws, band saws, saber saws, crosscut saws, miter saws, and rip saws. A hand saw is made from metal or plastic and cuts materials such as wood, plastics and metals.
Hand saws have the main advantage of cutting at precise angles without needing to adjust the blade. It's also much easier to sharpen them than power tools. There are also some drawbacks. For example, they are heavy and bulky, so you must be careful when transporting them. Additionally, if they are unfamiliar, it is possible to injure oneself.
You can hold a handsaw in many ways. You should always keep your hands far away from the blades while cutting. If you don't, you might get hurt. Holding the saw in your hands, place your thumbs on the handle and your thumb at the blade's top. This way, you won't accidentally touch the blade.
You should not place anything underneath the wood you are cutting with a handsaw. Doing this would cause the blade to slip off the wood's surface. Before you begin cutting, make sure to inspect the area. You must ensure that no nails, screws, or any other objects are under the wood.
Safety goggles should be worn when using a handsaw. They protect your eyes from dust, which makes it easier to see what is happening. Safety glasses protect your face against flying debris, which is another reason they are useful.
To work safely with a handheld saw, you need to first be able to operate it. Practice until you feel comfortable cutting. Once you've mastered the basics, you'll find that you can easily cut almost anything!