These are some tips to help you make the most of your scroll saw. These tips will allow you to safely and effectively use your scrollsaw. Also, make sure the scroll saw is securely screwed into the workbench. If it's not securely screwed into the workbench, vibration could cause it to slide along the surface. Also, make sure you have the blades installed correctly. Now you are ready to make furniture. Once you have completed these steps, you are ready for the scroll saw.
Dust blower
The General International 21-Inch Tilting Head Scroll Saw has solid upper and lower parallel arms for stable operation, as well as a built-in dust blower. You can also hook up a dust collector to collect sawdust during your work. The saw produces precise cuts with minimal noise and has a dust blower that can be adjusted for different airflow directions. If you already have a shop vacuum, this saw can be used as a shop vac.
Tilting the table
This article will show you how to use a scroll saw and tilting table. Scroll saws are a popular tool for many. However, prolonged hunching on them can make it uncomfortable. This is especially true if you have stiff shoulders or neck. There are many ways to remedy this issue and make your scrollsaw easier to use.
Spiral blades
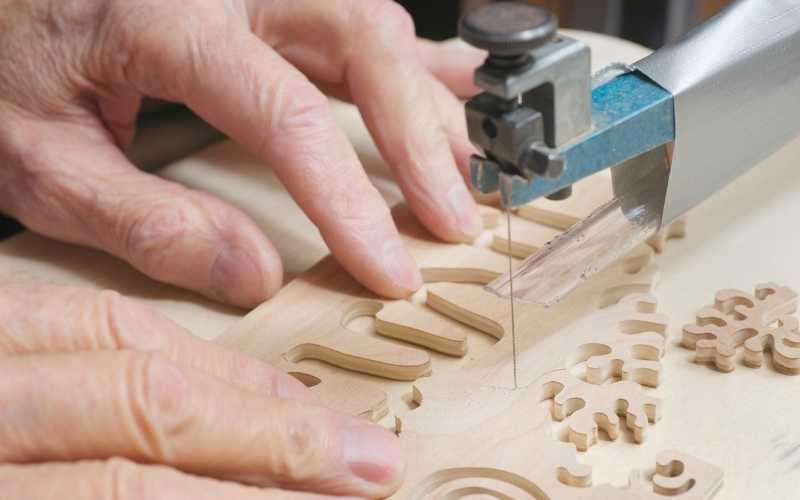
A straight blade is best if you need to make straight, long cuts with your scroll saw. Although it can be cumbersome to switch between straight and circular blades it can be much easier and yield better results. You can use spiral blades if you are looking for a simple tool that can cut through most materials. These blades have teeth that extend to the end of the blade.
Variable speed
It is crucial to choose the right scroll saw blades for your project. Scroll saw blades are available with a range of sizes and tooth configurations to fit different materials. Typically, the higher the number, the larger the blade, which will work well for thicker materials. Thicker woods require smaller blades. Below are the top scroll saw blades. To ensure that you get the best results, buy a blade that fits the material thickness that you plan on cutting.
Transferring patterns with colored carbon paper

You may want to transfer your patterns onto colored carbon papers before you start carving. Lay a piece of carbon paper over the desired pattern, then tape the other side. Clear packaging tape can also be used. It eliminates the need for adhesive removal and sanding. After you have taped down your pattern on the paper, trace your design on carbon paper using a ballpoint pen/dark pencil. Make sure not to move the pattern papers while you're tracing, or you may cut out the wrong pattern.
Keep a variety of blades in your arsenal
You might want to have spare blades if you are just starting out with a scrollsaw. The scroll saw is prone to miscuts. You must adjust the tension of your blade before you start. The blade can also become damaged if it isn't tightened properly. Therefore, it is a good idea budget for several spares. You can buy extra blades in your local hardware store or online.
Use an eraser on a pencil
To help you understand how to use your scroll saw, it is a good idea sketch a design in pencil first and attach it to the piece. Before you start your project make sure you check the settings of the scroll saw. Also, ensure the blade is correctly tensioned. Once you've drawn your design in pencil, drill 1/4" through the middle. Thread the blade through the hole and work gently out to the corners. Make sure to be cautious when you guide the blade.
How to choose the right blade

It can be confusing when buying a scroll saw for the first time. Different blades have different specifications. If you are just starting with a scrollsaw, it might be helpful to experiment with different types to help you decide which one you like best. Each type of blade is unique in its design and function and is best suited for a particular job. These are some suggestions to help you select the right scrollsaw blade.
FAQ
Are you looking for tips to start a woodworking company?
It can be difficult to start a woodworking shop. It's worth it if you're passionate and willing to work hard. You'll likely enjoy the challenge of owning your business.
When you are launching a new venture, it is important to be aware of the possibility that you will encounter unexpected difficulties. You might run out unexpectedly of funds. You might find customers not willing to pay the amount you expected. You must be ready to deal with such situations in order to survive.
A good tip is to open a separate bank account for your business. This will ensure that you always know how much money has come in.
How long does it take for furniture to be finished?
It depends on the wood type you choose, the complexity and the amount you apply to the finished product. Hardwoods, for example, require more maintenance than softwoods. Hardwoods tend to be more expensive that softwoods. But they last longer, and resist moisture better. Finishing furniture can take anywhere from one week up to three months.
Which woods are good to use for furniture-making?
Woods can be classified according to how hard they are. Softwoods include cedar and pine as well as cedar and cedar. They are great for outdoor furniture as they resist rot. These hardwoods include maple, mahogany and teak. Because they can't weather outside, they're usually used indoors.
How do I know what type of wood I'm dealing with?
Always verify the label on wood purchases. The label should provide information about the wood species, moisture content, and whether preservatives have been used.
Do you have the skills to learn woodworking?
It is best to do it yourself. Woodworking is an art form that requires patience, practice, skill, and experience. It takes time to master any craft.
You can learn the most effective way to master a skill is by actually doing it. Start small and learn from your mistakes.
Statistics
- Most woodworkers agree that lumber moisture needs to be under 10% for building furniture. (woodandshop.com)
- Overall employment of woodworkers is projected to grow 8 percent from 2020 to 2030, about as fast as the average for all occupations. (bls.gov)
- In 2014, there were just over 237,000 jobs for all woodworkers, with other wood product manufacturing employing 23 percent; wood kitchen cabinets and countertop manufacturing employing 21 percent. (theartcareerproject.com)
- Average lumber prices rose about 600 percent between April 2020 and May 2021. (familyhandyman.com)
External Links
How To
How do you measure wood accurately?
We have several ways to measure wood. We use a digital ruler (a tool to measure distances), laser level (used for leveling your work surface), and bubble level (used for levelling your work surface).
A digital caliper comes with two jaws. One jaw holds a measured object and the other measures distances between the points. The digital calculator is ideal for measuring very small distances, like the thicknesses or wood.
Laser levels are equipped with an infrared light beam, which projects a line across a floor. A red dot is created by the laser. If you look down on the line, it will show whether the surface appears even or not. Large surfaces can be checked for accuracy with laser levels.
Bubble levels look similar to a compass. The device has a bubble at its center. As long as the bubble is centered, the device will tell you whether the surface is level or not. For checking the accuracy of small areas, bubble levels are useful.