Use watercolor paint to add color or detail to your wood carvings. The paint sinks into wood, showing off the wood grain. The tubes and cakes are both available in watercolor paint. These are thicker and less likely not to drip. Keep in mind that water-based paints may be affected by dust or wood shavings, so be careful. If you have a lot of time on your hands, try applying a thin layer of primer before painting.
Oil-based oils
Oil-based oil paints can be used for painting wood carvings. Oil-based paints work better on some wood types like maple wood and birch. Avoid oil-based oils if you are painting kitchen utensils. Oil-based oil paints are great for wood carvings.
Watercolors
It's a great project to use watercolour paints on wood. You can express your creativity and keep the wood intact. Watercolors are non-warping. They do require some preparation. Although sandpaper can be useful, it is best to use a finer grit for the center of your wood carving. This will make the watercolor pigments pop out of the wood, and the wood will frame them. You should use protective eyewear as well as a dust-removal device to ensure safety.
Gesso
Before you can begin painting your wood carvings, you must first prepare the piece. You can use either the student or artist grade of gesso. The student grade is generally white, while the artist grade is darker. Acrylic paint is also available for those who want more pigmented paint. Combine gesso and painting to get the desired color. After drying, apply several thin coats paint.
Acrylic paints
Acrylic paints can be used to create beautiful woodcarving pieces. These paints don't cause harm and stick well to wood. Plus, they're non-toxic. They're ACMI-certified, making them great for anyone with sensitive skin. Here are some tips for choosing acrylic colors for woodcarving painting:
Oil-based paints mixed in gesso
Gesso is made from whiting and animal glues. Although it is most commonly white, you will find it in other colors, as well as transparent and colored varieties. The consistency of gesso will depend on the type you buy. Some brands will apply quickly, while some will leave a toothy look. Try different types until your preference is found. The Liquitex Super Heavy Gesso is a good choice for creating sculptural effects on a canvas. Use a palette to apply it.
Basswood panel
Before you apply paint to your basswood panels, seal the surface. The wood's natural components can cause paint to deteriorate over time. Sealers are used to make wood surfaces smooth and uniform. This prevents paint from getting in the wood pores. Properly sealing the wood will improve its durability. Here are some suggestions to seal your panel of basswood. Select the right sealer to protect your basswood panel.
Sealing coats
When you are using a sealer to protect your wood carvings, make sure to follow all instructions carefully. Use a paintbrush and apply the sealer thinly to the entire sculpture. Let the sealer dry completely in an open area before applying the next coat. Sand the carving lightly once the sealer is dry. Skip this step if you have very intricate carvings.
Using gesso
Before you start painting, make sure to prepare your wooden carving by applying gesso to both the front and back surfaces. This is a thinner gesso than student-grade. Therefore, it absorbs more paint. You can mix it in with acrylic paint, but this is not recommended. The amount of paint used will influence the thickness.
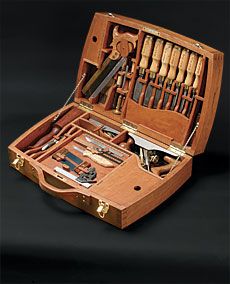
Chosening a wood

Because paint can alter the physical dimensions of wood carvings, it is crucial that you choose the right wood. A light and neutral wood allows you to paint over dark tones or highlight them. You can always paint the wood with a darker shade if it is too dark. Whether you choose to paint a whole piece of wood or just parts of it, you will want to choose a neutral wood for the painting.
Pre-treatments
Many wood carvings come with the ability to be colored or painted. These works of wood art require pre-treatment in order to prevent oils, water, and paints leaking through. This is especially true of softwoods like basswood, which is extremely absorbent. You can paint wood carvings with a special wood-based painting, but you should follow some guidelines to avoid any problems. This article will describe how to pretreat wood.
FAQ
How often should I buy new supplies?
Some tools will need to be replaced over time. Hand tools will need to be sharpened regularly. If you are using power tools, you will need to purchase replacement parts regularly. To avoid buying too much at once, try to spread your purchases out over a few months.
How long does it take to finish a piece of furniture?
It all depends on how large the furniture is. Boxes and picture frames are small projects that can be completed in one day. Larger projects, like desks or dining tables require several days. It takes time in order to properly stain or seal the wood.
What types of woods are best for furniture making?
Woods are classified according their hardness. Softwoods include pine, fir, cedar, and cypress. Because they are resistant to rot, softwoods are often used as outdoor furniture. The hardwoods are oak, maple and mahogany. Because they are not weather-resistant, they are best used indoors.
What's the difference between a hobbyist and a professional woodworker?
Hobbyists enjoy creating things out of wood. Professionals tend to focus on the quality. Hobbyists take great pride in their creations, and share them with family and friends. Professionals will spend hours looking at designs before they start to build a project. They'll be meticulous about every aspect of their work, from choosing the best materials to finishing it perfectly.
How does a beginner woodworker earn money?
Many people learn how to make furniture in order to set up an online business. You don't have to sell on Etsy if your furniture is just beginning. You could also sell at craft fairs, or other local events. Or you could offer workshops for others who want to learn how to build their own furniture. If you have the experience to be a carpenter, builder, or a designer, you may consider offering your services in remodeling homes or creating custom pieces.
Statistics
- The U.S. Bureau of Labor Statistics (BLS) estimates that the number of jobs for woodworkers will decline by 4% between 2019 and 2029. (indeed.com)
- If your lumber isn't as dry as you would like when you purchase it (over 22% in Glen Huey's opinion…probably over 10-15% in my opinion), then it's a good idea to let it acclimate to your workshop for a couple of weeks. (woodandshop.com)
- Overall employment of woodworkers is projected to grow 8 percent from 2020 to 2030, about as fast as the average for all occupations. (bls.gov)
- Most woodworkers agree that lumber moisture needs to be under 10% for building furniture. (woodandshop.com)
External Links
How To
How to stain wood
The process of staining wood involves the application of chemicals to the wood's surface, which causes it to change its color. This chemical reaction causes the wood to change from white to brownish red. Oak is the most common wood type for staining. However, you can also use other wood types.
There are many methods to apply stain to wood surfaces. Mixing the stain in a solvent such as turpentine and spraying it onto the wood is one method. Others use a solution made up of water and dye, which is then applied directly onto the wood. You can also mix stains with varnishes or paints so that they become part the finish coating.
Preparing your wood for staining is the first thing to do. The wood must be thoroughly cleaned to remove all grease and dirt. Sanding can smoothen out scratches and uneven spots. Then you must decide what kind of stain you want to use. Penetrating stains are different from non-penetrating. Penetrating colors penetrate deeper into wood than those that are non-penetrating. This makes them more suitable for darker colors, such as mahogany. Non-penetrating stains work best with light colors like maple.
You will need to decide on the type of stain you want to use, and then prepare your tools. A paintbrush works well for applying stains because it allows you to spread the liquid evenly across the surface. You should also have some handy rags to wipe up excess stains after you finish painting. If you are planning to mix your stain, ensure you have enough containers for each component.
After you have prepared the materials, you can clean the area where you want to stain the wood. To remove dirt and dust, use warm water and soap. Use a dampened rag and clean water to wipe the furniture. If you intend to stain darker wood, make sure you get rid of any debris.
Next, spray the stain. The stain can be applied by spraying or brushing the stain onto one end of the furniture. Work slowly and carefully, moving back and forth along the grain of the wood until you reach the opposite end. Be careful not to let the stain drip off the wood's edge. Before proceeding to the next step, let the stain dry thoroughly.
Protect the painted surface with a coat polyurethane paint sealant. Apply three coats with polyurethane. Allow the third coat to dry overnight, before sanding.