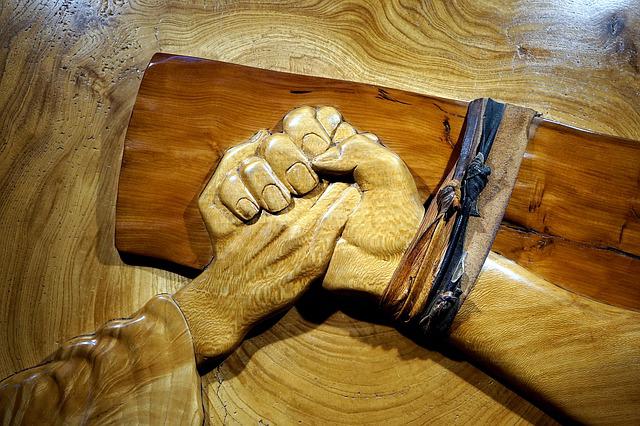
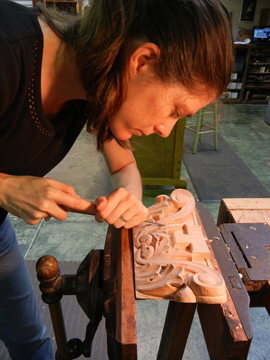
First, choose a piece and then make the required cuts to carve a face in wood. You can follow the expert's instructions using a step by step video. Carving the face will look more realistic if you use the progressing cut. The progression of the noses on the wood piece is the key to creating a lifelike face. To give your face a more realistic look, you can also use shellac and colored dyes.
Hardwoods
Before carving a face out of wood, it is important to consider what type of wood you will be using. Hardwoods are trees with broad leaves and can grow in a wide range of climate zones. Hardwoods are ideal for many purposes, such as furniture building and furniture making, due to their large range in density, strength, and appearance. Hardwoods can be more cost-effective than softwoods but are durable and fire-resistant.
If you're new to wood carving, you may want to consider using softwood, such as basswood or butternut. These types of wood are more easy to work and are an excellent choice for beginners. But, softer woods may not be as durable or beautiful as hardwoods. Before you decide on a type of wood, try out different types.
Softwoods
The first step when carving a face in wood is choosing the softwood to use. Softwoods tend to be more difficult to carve and will often have many knots. You can also break them more easily if you use large strokes. A beginner carver will frequently cut off small pieces of wood, reducing detail. Although this is not a serious problem, it is important to be aware.
Some hardwoods are easier than others. Aspen butternut, basswood and butternut are some of the easiest to work. It is recommended to use knives with a higher bevel. Softwoods are much easier to work than hardwoods. You can also carve them along or across the grain. The quality of your finished product will depend on the wood you choose for carving.
Colored Dyes
Colored dyes can be used to give wood carvings a vivid, detailed look. These dyes come in many colors, and you can mix them with alcohol or water to make your own unique color. Colored dyes can be mixed with shellac for lighter woods. Use denatured alcohol to clean your brushes after you have applied the dyes. You can also use paste wax. Excessive glossiness can distract you from your work. To remove any excess glossiness, use 0000 steel wool.
There are many wood dyes available and they can be applied easily. Wood dyes are compatible all topcoats, and they are easy to use. They can solve common finishing problems. They are easy to mix and use because they come in many primary colors. They're also available in a variety of shades and can be mixed according to individual preference. You can even mix them to create your own colors.
Shellac
Shellac is a product that can be applied to wood carvings. Make sure you have it handy. Although you can buy a jar of the stuff, it is easier to use a brush to apply it. Two-pound cuts will suffice. It will slowly build up and reduce brush marks. A thicker cut is better than a thin one because shellac can be very water-thin. Make your own pad out of small pieces of cotton and lintfree cloth. This will ensure you get the right amount. Now dip your brush in the Shellac.
Shellac can be used for accenting grain or adding color. Shellac is available as a variety colors. This allows you to mix and match different shades of resin to create your own blends. You can darken the shade with extra coats of lac. Shellac, unlike other wood finishes won't turn yellow or become cloudy. Shellac is also more durable, which means you can make even more faces. This can be done with any type or wood carving project.
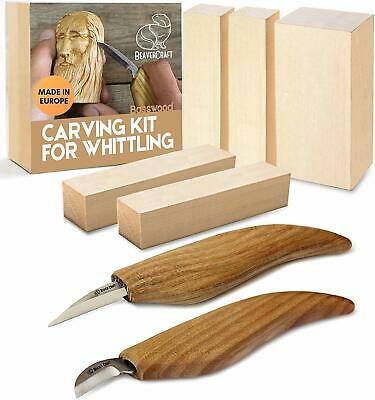
Gouges
There are many types of gouges. The straight and palm types of gouges tend to be the most popular. Palm gouges can be held in one hand, while straight gouges require a larger handle and shaft. Handheld carving becomes easier thanks to the shorter handles. These palm gouges can also be called veiners. They are perfect for carving faces into wood. Here are a few things to consider before you start carving.
First, you should know how to choose the right gouge. The gouge should be capable of carving a small v-shaped groove. Use a sharp, narrow edged tool. Gouges are commonly classified by size. A 3/10 gouge will create the same-sized cut as an 5/10 gouge. The scoop between the edges gets deeper as the first number is increased and the sweep becomes more curvy. A small-sized gouge will be capable of carving a shallow profile.
FAQ
How long does it take you to finish a piece?
It all depends upon the size of your piece of furniture. Boxes and picture frames are small projects that can be completed in one day. Larger projects like dining tables and desks require several days. It takes time and effort to properly stain the wood.
Where can I find free woodworking plan?
You don't need to purchase any books or magazines to find free woodworking plans. Just search Google. Simply type "free woodworking” into the search box and you'll find hundreds of websites that offer free plans.
How can you calculate woodworking pricing?
When calculating the costs of any project, it is important to keep them as low and affordable as possible. Always ensure you are getting the best possible price for materials. It's also worth taking into account all the other factors that may affect the cost of your projects, such as time, skill level, and experience. To get an idea about the average cost for common household DIY tasks, see our guide to the average woodwork project price.
What kind tools do carpenters use to build?
The most common tool used by carpenters is a hammer. A hammer is useful for driving nails into wood. They can also use it to hold the pieces together as they work on a project. Other tools include clamps. pliers. screwdrivers. measuring tape. pencils. saws. drills. wrenches.
What's the difference between plywood vs particle board?
Plywood is made of layers of wood that are pressed together under pressure. Plywood can be cut to different thicknesses. It's commonly used as flooring and cabinets. Particle board can be made from sawdust, resin, and then compressed to make large blocks. It is used primarily for home improvements. Both types are sturdy and easy to cut.
What tools should I start with when becoming a woodworker?
Woodworking is an art that takes patience and practice. It takes time and practice to master the various techniques and tools required for woodworking.
There are many types of woodworking equipment on the market today. Some people prefer to use power tools while others prefer manual tools.
The choice is yours, but you must ensure you choose the right tool for the job. It may be a good idea to start with a basic set, if possible, if you don’t know much about hand tools.
You might also want to learn how a router works, which allows you to cut wood into intricate shapes. You can find these at most hardware stores.
Are you able to teach yourself woodworking
The best way to learn anything is by doing. Woodworking takes practice, skill, patience and experience. Mastering any craft takes time.
You can learn the most effective way to master a skill is by actually doing it. Start small and use what you learn.
Statistics
- The U.S. Bureau of Labor Statistics (BLS) estimates that the number of jobs for woodworkers will decline by 4% between 2019 and 2029. (indeed.com)
- Woodworkers on the lower end of that spectrum, the bottom 10% to be exact, make roughly $24,000 a year, while the top 10% makes $108,000. (zippia.com)
- Average lumber prices rose about 600 percent between April 2020 and May 2021. (familyhandyman.com)
- Most woodworkers agree that lumber moisture needs to be under 10% for building furniture. (woodandshop.com)
External Links
How To
Tips on how to drive a nail in wood
It is essential to pick the right size and style of hammer before you can drive a nail in wood. The most popular types of hammers include claw hammers as well as mallets and ball peenhammers. Each type has its strengths and weaknesses. A claw hammer, for example, is the best choice if you need to hit nails hard. However, it's not easy to know exactly where the impact will land. A sledgehammer is useful for striking large areas at once but too heavy to be effective for smaller tasks.
Place your hand flat on the side of your chosen hammer so that the handle rests in your palm. Grip the handle firmly, but don't squeeze it so tightly that you hurt yourself. You should hold the hammer straight-up, with your wrist still relaxed. Swing the hammer back towards the ground, with your aim at the middle of the nail. The impact of the hammer hitting the nail should be felt. Try practicing with a block to help you master the art of swinging a stick.
The hammer should be held close to your body when you are ready to begin driving the nail. The nail should be perpendicular to wood's surface. Your eyes should be focused on the nail's tip. Swing the hammer forward, and then move the hammerhead. Continue this motion several times, slowly increasing the speed of each swing. Once you have mastered this technique, increase the power of your swings. Try holding the hammer above your shoulder and bring it down forcefully. This way, you'll be able to put more energy behind your blows.
Once you've nailed the first hole, remove the hammer from the nail. To remove the remainder of the nails, you can use a screwdriver/pry bar. To prevent splitting the wood, ensure you keep the nail heads flush against the board's surface.